How to setup receipt/bill printer in eZee Optimus?
eZee Optimus Printing Process

Check List-
- The printer should be connected to the machine and the test print should be working fine.
- The IP address of that machine should be static to proceed further with configuration.
- Printer drivers should be installed correctly.
- LAN/ WiFi/ Network printer/ USB connection should be there between the printer and the computer on which Optimus printing service is installed or Printer and the computer should be in the same ethernet connection.
- If using a Mobile phone or Tablet for ordering, It should be connected through the wifi on the same network.
eZee Optimus: Printing Option
eZee Printer Service / EOP V 2.0
Will work with the printer driver
- Windows PC
- Apple Mac
- Linux
Ethernet Printer
Will work with Printer ePOS SDK
- EPSON TM T-30
- Any ePOS Supported Printer
Browser Printer
Will work with browser printing
- Chrome
- Mozilla
- Any Browser
Steps to configure printer at the software side
Switch To Back (Configuration)
(Path: Click on your user name >> Switch to Back)

Enable Printer Settings
(Setting >> General Setting >> Printing Setting)

Virtual Device (Add Device): All the devices need to be Added as a virtual device here with the specification of the type of operation for which it is going to be used, i.e., Receipt, BAR Printer, Kitchen Printer, etc.
Go to: Configuration Panel > Settings > virtual Device > Add

Terminal: A terminal is used to a mapped virtual device with a physical device which is connected to a machine. For printing to work from eZee Optimus, all the printers which are needed to print Receipt/KOT need to be configured in the Terminal Module.
Terminal Configuration:
Goto: Back Office > Settings > Terminal > Add To add a new terminal, click on the ADD(+) button on the top-right corner of the terminal listing screen

As shown in the picture, the printers can be added to the terminal by clicking on the Device Mapping (+) Button.
Terminal: Add Device Mapping
Adding a device is a very crucial part of printer
configuration. The wrong configuration may lead to inconsistent printing
or no printing at all from the software for KOT and receipt even if you
are getting a test print from your connected printer.

Below given is a description of the properties of the device mapping form.
1) Type: Select the printer behavior as it will KOT printer, Receipt printer, Fiscal printer, Captain printer, etc.
 2) Virtual Device: As per the type selection, it will give you the list of virtual devices you have added with respective types.
 3) Connection Type: Select the mode of connection which are offering which is Optimus printing service, Ethernet-based, Bluetooth printers.

: Browser :
This is available for Receipt Printer Only. With this setting, all communication with the printer will be handled by the browser. So whatever printer is supported by the browser we can print a receipt on it.
: Optimus printing service :
Optimus Print Service is required when needed to print on multiple printers. For this option, you need to Install Optimus Print Service on the Terminal or Printer server where printers are connected or installed. You can set up it on multiple bases on your hardware setup. On the selection of this connection type, the system will ask for the IP address where Optimus Printer Service Installed. You can use 127.0.0.1 if you are using the software on a single machine and service is installed on the same machine as well. When Service is installed on a different computer, you need to set a fixed IP (Static IP) address of that computer and map it with this field.
eZee Optimus Printer Service (EOP): Installation
Download service from the following link.
https://ezeenextgen.s3-us-west-2.amazonaws.com/download/Integration/EO%20Printer/EOP_Setup.exe
- Run the EOP_Setup.exe file to start the installation process.
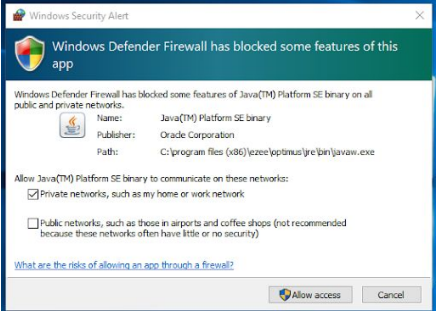
- After the installation is complete, when you’ll run the EOP for the first time, the following dialogue will appear. Click on Allow Access.
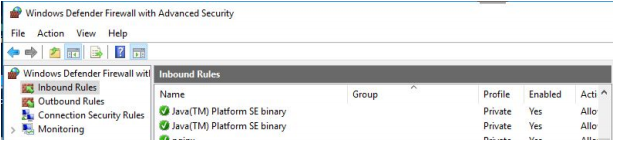
- To check whether it has access or not, Navigate to Windows Control
Panel, System and Security and Windows Firewall. Select Advanced
settings and highlight Inbound Rules in the left pane.
You should see something like the following image.
- Note: The EOP must be running on the same machine where the printer is installed.
- Enter Optimus Code in EOP Service and “Save”

eZee Optimus Printer Service: Troubleshooting
A) Check if the printer service is running.
Type the following URL in the address bar of the browser:
<ip>:8006, where <ip> is the IP of the machine which is
configured in the terminal.
e.g. 127.0.0.1:8006
If the printer service is connected, you’ll see a message in the window saying “Printer service is started on Port: 8006”.

If you don’t see this message, check firewall rules and restart the eO Printer Service.
B) Check if the printer service can send the prints to the printer.
Right-click on the EOP in the system tray. Click on the Printers. The screen shown in the following image will open.
● If the printing is working from this screen then it means that the printer service is connected to the printer.
● If not, check if the printer is connected to the machine. You can
check it by printing a test page from printer preferences or printing a
Notepad Document.
● If all of the above checkpoints are working fine. then move to the next point.

C) Check Terminal configuration
● Check Device Name if it matches the name given in Printer Properties in Printer settings of the machine. It must be the same.
D) Service Installed on Different Machine
In case you’re sending a print from a different machine/tablet
of the same network (other than the one in which the printer is
connected)
● Make sure the EOP is running on the HOST.
● Perform the 1st step of troubleshooting in the CLIENT.
● The printing will work only if you can access the EOP from the CLIENT.
● If you don’t receive any acknowledgment than check the Windows
Firewall/Defender Setting in HOST and Make sure the Java(TM) Platform SE
binary is allowed all accesses in the public network.
Note: HOST – Machine in which the printer is connected and EOP is running.
CLIENT – Machine(s)/Device(s) in the same network other than the Host.
E) Firewall Setting (If Required)
Navigate to the Windows Control Panel, System and Security and
Windows Firewall. Select Advanced settings and highlight Inbound Rules
in the left pane. Find Java(TM) Platform SE Binary.

: Ethernet :
Optimus can print directly to a network printer without Optimus Print Service. But this Option is available for limited printers only (List the available printers). On the selection of this option, the system will ask for the IP address of that printer and enter 8043 in the port number field.
Ethernet: Troubleshooting
I) Check if the printer is in the network.
Open terminal and ping IP of the printer. If connection times out, then the printer is not connected to the network.
II) Check the IP and port in the terminal configuration.
● As stated in Terminal Configuration, In ethernet printing, the IP
field should contain the IP of the printer instead of the machine
itself. So please check if it’s right.
● The port should be 8043. If it doesn’t work, find the port in the
printer utility (can be opened by typing the printer IP in the address
bar of the browser)
: EOP v2.0 :
EOP v2.0 setup allows printing without popup “Printing in Progress” also known as [Silent Printing]
- Install Optimus Printing Service (EOP)
-
Go to Drive C:\Windows\System32\drivers\etc\Hosts
Copy HOST file and paste on Desktop >> Open file in Notepad and add the settings as below.

Save this file and again go to the path (C:\Windows\System32\drivers\etc) and replace the desktop file here.
Add 127.0.0.1 interface.ipms247.com [127.0.0.1(Space)interface.ipms247.com]
Also, you can use your Computer IP with 127.0.0.1 in a new line. - Go to the front end. Open a new tab and type IP address along with port number 8443 (Example:- 127.0.0.1:8443 or 127.0.0.1:8006 | https://interface.ipms247.com:8443/ or https://interface.ipms247.com:8006/)This will help you to check whether print service has started on your system or not. Refer below screenshot.

4) Device Name: You have to enter your Printer Name in this column

5) IP: You have to enter the correct IP based on Connection Type
Please refer to the detail below for reference according to connection Type
Optimus Printing Service:- IP should be “127.0.01″ or your “Computer IP”
Ethernet:- Enter “Printer IP” and (Port) should be “8043”
EOP v2.0:- No need to use IP select URL “interface.ipms247.com”
How to find a computer IP? (Click Here)
How to set a fixed IP/Static IP? (Click Here)
6) Template Setting: Select the particular template defined for printing according to Type as KOT Template shown in the below screenshot.

Privilege Required:
- Access To Back Office

- Settings

- Terminal
